
Here's the finished set:
 |
| I like the way the snowman is spread across three nails and a full size snowman isn't squashed onto one nail |
I used:
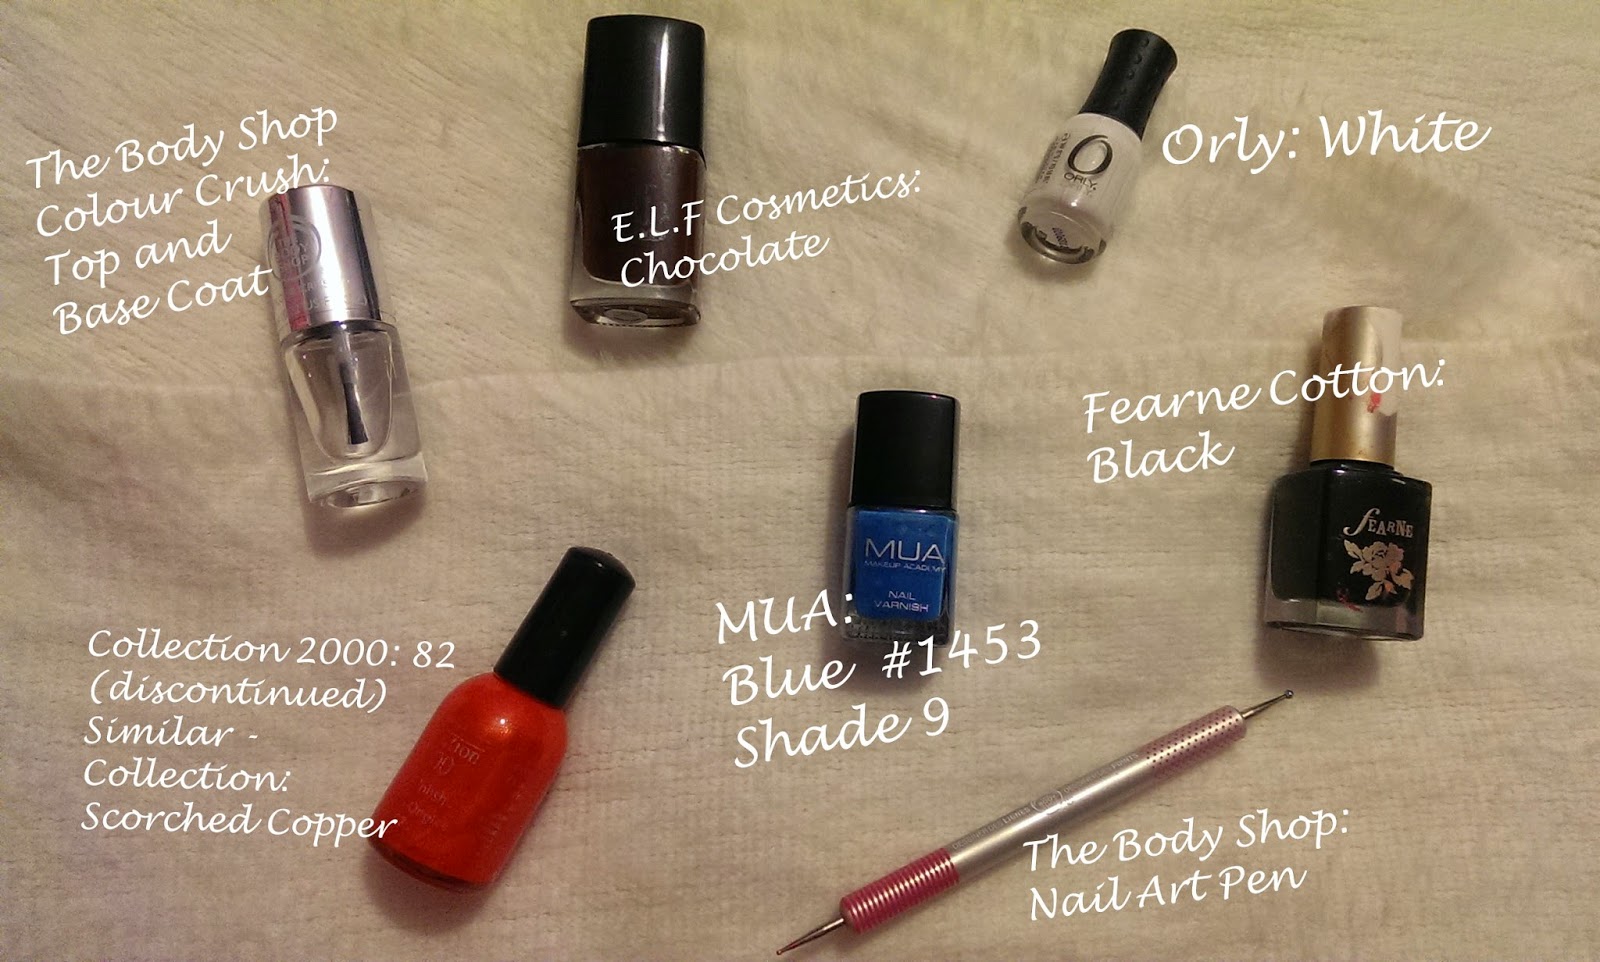
What to do:
1) Paint all nails light blue.
Leave to dry
2) To your index finger and ring finger add brown 'twig like' lines
3) To your thumb and index, ring and little fingers add white 'snow' dots
Leave to dry
4) To your middle finger add a semi-circle from the tip towards the middle of the nail of white and some white 'snow' dots above the cuticle
Leave to dry
5) Add two black dots to the white semi circle and an orange triangle for the eyes and nose
And you're done. Finish with a top coat and you're good to go. I wouldn't recommend doing this in a rush because the stages each need to dry or the varnishes just run into each other.
Unfortunately this design does use quite a lot of different colours. The black could be substituted for the brown and vice versa so you would only need one of these dark colours. But you'll definitely need an orange....every snowman's nose has to be an orange carrot!
So there's another design...I hope you're enjoying these!
See you tomorrow
Love, Hannah


No comments